Thursday, January 28, 2010

A little pantry crafting....


I admit it....I have become a little obsessed with making art supplies from things in my pantry.  I get all excited every time I find a new recipe or empty a new little jar!  My husband has been laughing hysterically at me ever since he caught me going through the recycling bin and pulling things out. "I can USE this" I yell at him!  I am turning into my father a little bit in that aspect, I think!
Today, we decided to make home made water colors.  I cannot get over how quick and easy this was! 
You will need:

*Liquid food coloring
*3 teaspoons light corn syrup
*6 tablespoons cornstarch
*6 tablespoons baking soda
*6 tablespoons white vinegar
(*Adorable helper, though not required, a huge plus!*)

Combine cornstarch, baking soda, vinegar and corn syrup in a bowl---get ready to witness a little science experiment---it fizzes and foams!


Pour into small containers.  You can use whatever you want for this!  We used an old mustard jar, and leftover crayola paint containers.  If you want to make small amounts, lids and egg cartons (the styrofoam ones) would work well.


Add food coloring--as much or as little as you would like.  We decided this go around that we would just do primary colors.  We tried stirring with toothpicks at first, but realized that shaking worked better


Adorable helper #2 (who previously wanted nothing to do with the recipe, came running when she saw shaking involved!)


Allow the paints to dry, or cover to keep them moist. 

Ta-Da!


They really do work!  I tried them out!  Add this to our list of things we will NEVER buy again!

Thursday, January 21, 2010

Just Spreading the Love....


I know it's early, but the girls and I have already started on some Valentine's Day crafts.  We take any excuse we can to paint with pink and purple!
On Tuesday, we did a little "Head Over Heels Craft"

Here is what you need:

Paper cut into a heart shape (I recommend choosing Valentine-ish colored paper) and washable paint


I found that clipping the heart to a piece of cardboard helped keep everything in place when it was time for the footprint


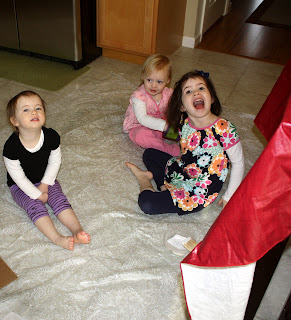
I covered the floor with an old vinyl tablecloth and put my eager little artists on the floor


Dip the child's foot into the paint and press on the heart shaped paper.  The final result looks like this:


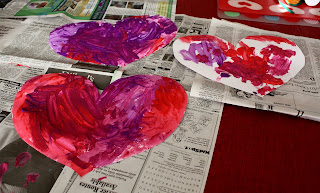
Now, we could have stopped there, but the girls wanted to paint some more, and who am I to stop the creative juices?  Next I got some cardstock and cut out slightly larger hearts and let the girls go to town painting them however they wanted:


The final result turned out like this


When everything is dry, attach the 2 hearts to each other.  Write "Head Over Heels For You" on the construction paper heart.  Emily and I had a very long conversation about where we should display our newest art.  She insisted that since it said Head OVER Heels that we should hang the hearts up high.  No problem....I think I found the perfect place:

All I did was punch a hole in the cardstock and loop some silver ribbon through.  Voila!  Done!

Now, onto today's craft.  Do you ever have those ideas that sound so perfect in theory, but when you are in the midst of the activity, you think "WHAT WAS I THINKING?!"  That was today's craft.....it just didn't turn out as I was hoping, but the girls had fun and that's all that mattered! 

For this texture art, you need a bunch of random materials-All of which you probably already have. 


We chose buttons, noodles, leftover hair grippies that I don't use anymore, crumpled up tissue paper and some twine.  You are going for a bunch of different textures!
You will also need


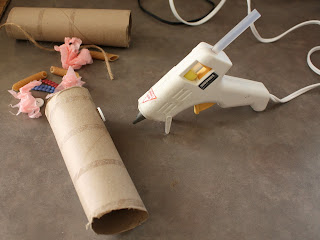
A hot glue gun and toilet paper roll!  I keep all used paper towel and toilet paper rolls--they are very handy craft materials!

Next, let your child pick through the bucket for what they want on their texture roll...this is a good time to practice counting for the younger ones and a good time to talk about how different things feel.
Once they have chosen what they want, the ADULT needs to hot glue them onto the cardboard roll


Before we started the craft part, we had lots of fun playing with these.  I asked the girls to think of different things to do with them....they became microphones, telephones, pirate looky things (nice technical term there!).  Emily even acted like hers was a mustache!

Next, give each child a paper plate with some paint on it.  Show them how to roll the tube into the paint and then roll the tube on the paper.  Explain that it will be bumpy--almost like driving over train tracks


It did end up being a little messy...make sure you have the wipes or wash cloth near by!
Now...after doing this, I have some advice....don't do the tissue paper--we ended up pulling that off because it just soaked up a lot of paint.  Start with just a little bit of paint-you can always add more.  I think I had too much paint out.
Charlie (who is 18 months old), really just bounced hers on the paper more than rolling it, and that is fine!  Let the kids be the boss!  Emily (4.5) really got the concept and had a good time with it.  Allie (almost 3) did a little of both-bouncing and rolling!  Here are our finished papers:


After they dried, we went back and tried to see if we could pick out different items that were rolled onto the paper.  The buttons were easy to pick out-others you had to look for a little harder!

So yeah....they didn't turn out exactly how I had imagined, but like I said, the girls had fun and we were able to have some good discussion during our art time this morning!

I would LOVE to see pictures of any of these crafts you end up trying!  Please share!!


Tuesday, January 19, 2010

Craft Cabinet

I came across this post on one of my favorite blogs: No Time For Flash Cards  She shows her craft closet.  Love it!  When we lived at the beach, we had a closet under the stairs that served as my craft closet.  It was great to have that stuff right there on the same floor as us!
Now I am lucky enough to have a craft room (our 4th bedroom-the room over the garage) where I keep my sewing machine, all my ribbons, material, tulle, etc.
I hate running up and down the stairs too many times during the day because I always have little feet follwing me, so I cleaned out a cabinet over our desk area in the kitchen and reserved it for craft materials!


We also have a 3 drawer metal cart in the playroom that serves as the coloring book/crayons/markers/some stickers/paper, etc....
I would show a picture of it, but it is a MESS right now!!!  I just glanced over at it as I was typing and added it to my to-do list for today!

How do YOU store your kid craft supplies?

Monday, January 18, 2010

Play Dough!!!

We had a very busy weekend-Emily was a flower girl in Ben's cousin Jenny's wedding! It was a gorgeous wedding, and I will be uploading pictures and video soon!
Because we were still adjusting to being back at home and getting out of the vacation fog, we were slow moving today! I decided that it might be fun to make up a batch of play dough after lunch.
It is SUPER easy and VERY cheap! Most of the ingredients are those that you probably already have in your pantry. Thankfully my neighbor had some cream of tartar that she let me borrow (Thanks Paula!)---I see HUGE containers of cream of tartar in my future! I will NEVER purchase "PlayDoh" again!!!
Here are the directions if you want to try it yourself:

Ingredients:
1 cup salt
2 cups flour
4 tablespoons cream of tartar
2 tablespoons vegetable oil
2 cups water
Food Coloring


In a medium sized sauce pan add the dry ingredients:


Next add the oil and water

Using a wooden spoon over medium heat, stir mixture-it will be liquidy at first


Add food coloring (I didn't have any liquid food coloring-I only had icing coloring, which is sort of like a gel--it did the trick, but I am going to get some liquid food coloring for next time)
Add as much or as little as desired, until you acieve the color you like.
As the mixture begins to heat up, you will notice the lumps getting larger in size and the mixture more difficult to stir-continue stirring
When it is almost 1 big lump and begins separating from the sides of the pan, pour onto counter.  Cool for a few minutes.


Once cooled, kneed by hand for a few minutes.  Place in air tight container.


(Please excuse the smudge on the container--this has become my crafting bowl-most recently, I mixed shaving cream and glue in it!)

So there you have it!  CHEAP and EASY play dough!  My girls LOVED making it and will have even more fun playing with it!

Thursday, January 14, 2010

Winter Wonderland

This week, the girls and (plus our new little friend Charlie!) made lots of fun snowflake related crafts...well, 3 snowflake related crafts, not a lot, but still...fun times!

Our first craft was coffee filter and cupcake liner snowflakes. I saw a similar idea on www.notimeforflashcards.com she used cupcake liners and then glittered them up and made a garland. Super cute. I had it in my head to make a lot and hang them from our playroom ceiling, which is just what we did!
I watered down blue tempura paint and let the girls paint the coffee filters and cupcake liners. We gave little Charlie a dot marker and then dropped a little water on her art to make it more transparent.


We used some medicine droppers too to spot the paint here and there


This was a fun craft for all of us


We let the filters and liners dry while we ate lunch. After lunch, Charlie went down for a nap and we began folding and cutting the snowflakes. Emily helped a lot, but I did most of them. After that it was the part that the girls had been waiting for! The GLITTER!!!


Now we have a beautiful winter wonderland playroom! The girls LOVE it! They walk in and say "Oh! It's Sooooo cold in here! It's snowing!!!"


A couple of days later we made shaving cream snowmen. This was a lot of fun for the girls as well. I mixed equal parts shaving cream and glue and the girls painted it on a blue piece of paper. I had drawn snowman templates on the paper and Emily was able to make hers resemble a snowman...the younger girls just had fun painting! It dried with a nice raised texture and looks a lot like snow! We still need to go back and finish them....add buttons and such.


We took a couple of days and just colored and water painted and got back in the organized craft mode today.
A friend introduced me to a great blog: http://www.frugalfamilyfunblog.com/
I am obsessed with it! LOTS of great ideas and the best part?! The are CHEAP!!!
I really liked this idea:
http://www.frugalfamilyfunblog.com/2009/12/art-so-easy-toddler-can-do-it.html

I didn't have any canvas on hand, so I went exploring in my basement. I found a white cardboard box and thought "Voila!". I cut the bottom off of it, a piece of the side and there I had my 3 squares. Next, I taped out the snowflake shape


The girls were so excited and jumped right in painting their masterpieces


After we covered the whole square, we set them aside to dry. I started getting lunch ready and I heard the girls talk about their tea party. I was so proud when I looked in the playroom and saw what they had decided (on their own!) to use as their table---just the piece of "trash" that I had thrown to the side! LOVE creativity!!!


Yep! It was the box I had cut up! Made me very happy to see them thinking that way!

Anyway-back to the snowflakes---we removed the tape and outlined it in black, and ta-da!!! Our beautiful artwork!

So, that was our week. Lots of fun winter crafts! I am trying to think of what to do next week....stay tuned!