I know it's early, but the girls and I have already started on some Valentine's Day crafts. We take any excuse we can to paint with pink and purple!
On Tuesday, we did a little "Head Over Heels Craft"
Here is what you need:
Paper cut into a heart shape (I recommend choosing Valentine-ish colored paper) and washable paint
I found that clipping the heart to a piece of cardboard helped keep everything in place when it was time for the footprint
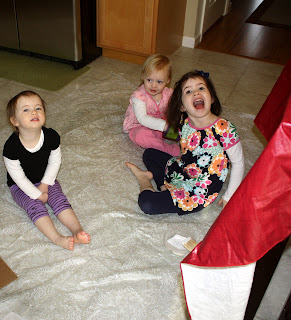
I covered the floor with an old vinyl tablecloth and put my eager little artists on the floor
Dip the child's foot into the paint and press on the heart shaped paper. The final result looks like this:
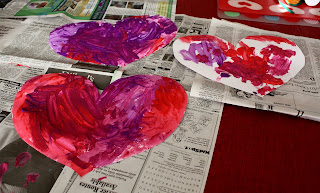
Now, we could have stopped there, but the girls wanted to paint some more, and who am I to stop the creative juices? Next I got some cardstock and cut out slightly larger hearts and let the girls go to town painting them however they wanted:
The final result turned out like this
When everything is dry, attach the 2 hearts to each other. Write "Head Over Heels For You" on the construction paper heart. Emily and I had a very long conversation about where we should display our newest art. She insisted that since it said Head OVER Heels that we should hang the hearts up high. No problem....I think I found the perfect place:
All I did was punch a hole in the cardstock and loop some silver ribbon through. Voila! Done!
Now, onto today's craft. Do you ever have those ideas that sound so perfect in theory, but when you are in the midst of the activity, you think "WHAT WAS I THINKING?!" That was today's craft.....it just didn't turn out as I was hoping, but the girls had fun and that's all that mattered!
For this texture art, you need a bunch of random materials-All of which you probably already have.
We chose buttons, noodles, leftover hair grippies that I don't use anymore, crumpled up tissue paper and some twine. You are going for a bunch of different textures!
You will also need
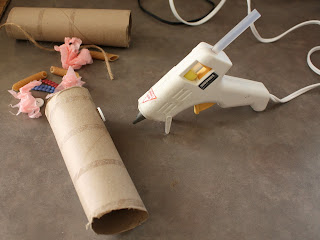
A hot glue gun and toilet paper roll! I keep all used paper towel and toilet paper rolls--they are very handy craft materials!
Next, let your child pick through the bucket for what they want on their texture roll...this is a good time to practice counting for the younger ones and a good time to talk about how different things feel.
Once they have chosen what they want, the ADULT needs to hot glue them onto the cardboard roll
Before we started the craft part, we had lots of fun playing with these. I asked the girls to think of different things to do with them....they became microphones, telephones, pirate looky things (nice technical term there!). Emily even acted like hers was a mustache!
Next, give each child a paper plate with some paint on it. Show them how to roll the tube into the paint and then roll the tube on the paper. Explain that it will be bumpy--almost like driving over train tracks
It did end up being a little messy...make sure you have the wipes or wash cloth near by!
Now...after doing this, I have some advice....don't do the tissue paper--we ended up pulling that off because it just soaked up a lot of paint. Start with just a little bit of paint-you can always add more. I think I had too much paint out.
Charlie (who is 18 months old), really just bounced hers on the paper more than rolling it, and that is fine! Let the kids be the boss! Emily (4.5) really got the concept and had a good time with it. Allie (almost 3) did a little of both-bouncing and rolling! Here are our finished papers:
After they dried, we went back and tried to see if we could pick out different items that were rolled onto the paper. The buttons were easy to pick out-others you had to look for a little harder!
So yeah....they didn't turn out exactly how I had imagined, but like I said, the girls had fun and we were able to have some good discussion during our art time this morning!
I would LOVE to see pictures of any of these crafts you end up trying! Please share!!


What a creative idea to make the texture rollers! I bet my kids would love to try that!
ReplyDelete